


When we decided to remodel the guest bathroom I wasn’t even thinking that I should change the previous ugly white vanity, but after finishing painting the wall and placing the board and battens I knew we needed a new vanity.
I really like vessel sink vanities, so I did some research and found a couple of DIY projects I liked on Pinterest. I showed them to my husband and after telling him that I wanted a hybrid of about 3 vanities I liked he came up with the vanity that we (we as in he) built.
Full disclosure: we’re completely new to “built your on furniture” but thanks to my husband who knows about construction (he’s a really handy software engineer) we were able to get it done; I don’t even know how to turn on some of our power tools and I’m pretty jealous of the ability my husband has to work with tools. I wish that when I was in school I had a shop class. Sadly, in my country, girls’ working with tools is not common so it’s not something they teach to us. I’ve always wanted to learn how to use powers tools and now that I’ve gotten the construction itch I’m learning more with my husband.
Let’s build a bathroom vanity:
My husband measured the dimension of the space we have and I researched standards for height width; we decided to build the vanity to be 35” high from the floor to the top of the vessel sink.
He made a couple of sketches, walked around, moaned and groaned and then went to The Home Depot. We were supposed to get a 4×4 for the legs but we didn’t because we don’t have a truck and Home Depot won’t cut a 4×4 (bummer); so 2×4’s were used as the legs instead. The vanity was built mainly with a brad gun to hold all of the pieces together. The pieces were cut using a miter saw even though there were no mitered angles (you could use a skill saw or even a reciprocating saw). We didn’t use any glue to keep the tabletop together or even the pieces; It’s all brads, and wood filler to cover the holes the brads make.
When staining the wood I recommend using a rag and a slightly diluted color; wet the wood, stain it, and wipe the wood clean. This method is great because it allows you to add build up to the color you want while also bringing our definition from the wood grain.
We got this beautiful vessel sink, brass faucet and brass drain from amazon and Kevin roughed in the plumbing using the trap from our old pedicel sink. When we were cutting the holes for the trap and angle stops we discovered that we should’ve cut the holes in the countertop and the back of the vanity before we stained and poly’ed it but we didn’t so learn from our mistakes J.


Cuando decidimos remodelar el baño de invitados ni siquiera había pensando que debería cambiar el anterior tocador blanco feo que teníamos, pero después de terminar de pintar la pared y colocar el enmarcado de madera sabía que necesitábamos una nueva tocador de baño. Me gusta mucho que tienen el bol encima, así que decidí buscar mas información de cómo hacer un tocador tu misma. Encontré unos cuantos en Pinterest. Les mostré a mi esposo y después de decirle que explicarle que quería un híbrido de por lo menos tres tocadores que me gustaron y terminamos con esta idea que fue el que mi esposo construyó.
Es importante mencionar que nosotros somos completamente nuevos a esta categoría de has tu propio mueble, esta es la primera vez que hacemos algo así. Lo bueno es que mi marido no solo es un genio como ingeniero de sistemas pero también sabe como usar herramientas. Yo la verdad no se ni como prender muchas de ellas. La verdad le tengo mucha envidia de cómo saber usar herramienta ya que lo aprendió en el colegio y con su papa, en mi colegio no había ese tipo de clase y mi papa solo sabia usar el martillo…jaja. Lo bueno es que con mi esposo estoy aprendiendo cada un poco mas de cómo usar herramientas y la verdad me encanta.
Cómo construir tu misma un tocador del baño:
Mi esposo tomó las medidas del espacio donde colocaríamos, yo busque los datos de las medidas estándares de un tocador de baño. La altura es de 35” que va desde la base hasta la parte mas alta del bol.
Kevin hizo unos cuantos bosquejos y se fue a comprar los materiales a Home Depot. Se suponía que íbamos a hacer las patas del tocador con madera 4×4 pero no la usamos porque Home Depot no corta este tipo de madera y nosotros no tenemos camioneta grande para traer la madera. Así que usamos 2 x4. El tocador fue construido principalmente con una pistola de clavos. Las piezas se cortaron con una sierra de ingletes a pesar de que no hubo ángulos de inglete, pero puedes usar la sierra que tengas. No usamos ningún tipo de pegamento para mantener el tablero de la mesa juntos. Solo usamos la pistola de clavos, para cubrir los agujeros dejados por los clavos usamos relleno de madera.
Cuando teñir de la madera le recomiendo usar un trapo y el stain ligeramente diluido con agua. Yo prefiero construir el color poco a poco, aplico capa por capa hasta que este feliz con el color. A mi en particular me gusta darle eso toque de madera antigua o reciclada donde se ven puede apreciar las marcas de la madera.
Compramos el bol de porcelana, el grifo y la tapita del bol en Amazon y Kevin hizo todas las conexiones de plomería. Hay una cosa que nosotros no hicimos pero les recomiendo hacerla. Corte los huecos de la tubería y el grifo antes de pintar el mueve, aprenda de nuestro errores. A nosotros nos tocó volver a retocar la pintura después de hacerle los huecos. No se olviden de colocar el barniz a la parte superior del tocador.
[one_half]

[one_half]

[one_half]

[one_half]

[one_half]

[one_half]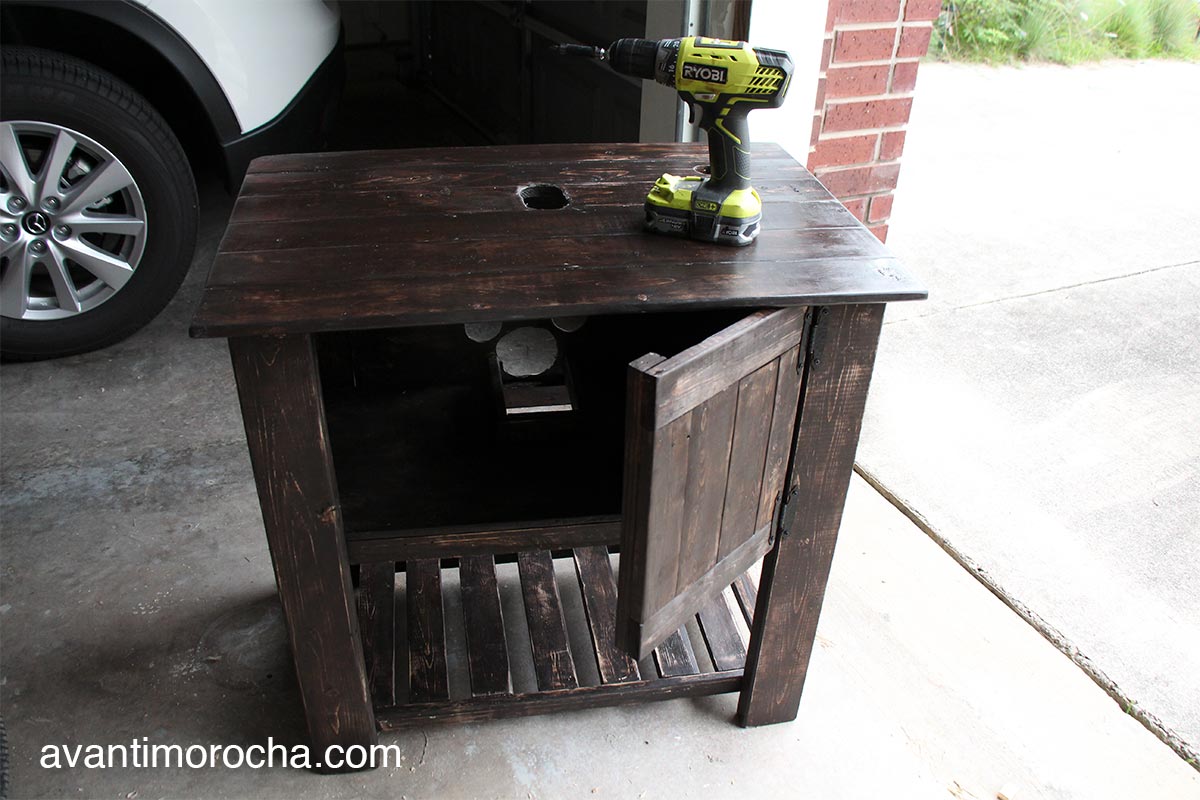


[/one_half_last]
[one_half]
[one_half_last]
Materials
- 2 -2x4x8 foot
- 5-1x2x8 foot
- 6- 1x3x8 foot
- 2×4 plywood
- Wood stain
- 1box of brads
- Polycrylic Protective Finish
- Cotton rags
- Door handles and hinges
Tools
- Brad gun
- Miter saw
- Skill saw
- Hammer
- Orbital Sander


These are the products I got from amazon. Estos son los productos que compre en Amazon.
*Amazon Affiliate links
[one_third]
You can get the same mirror at Wayfair

Smythe Wall Mirror Frame Finish: Gold
from: Wayfair


Check this post to see how we’d completed the project “DIY Guest Bathroom Makeover”. Revisa como quedo el proyecto del baño de invitados.